Common Window Flashing Mistakes: The Definitive Architectural Guide
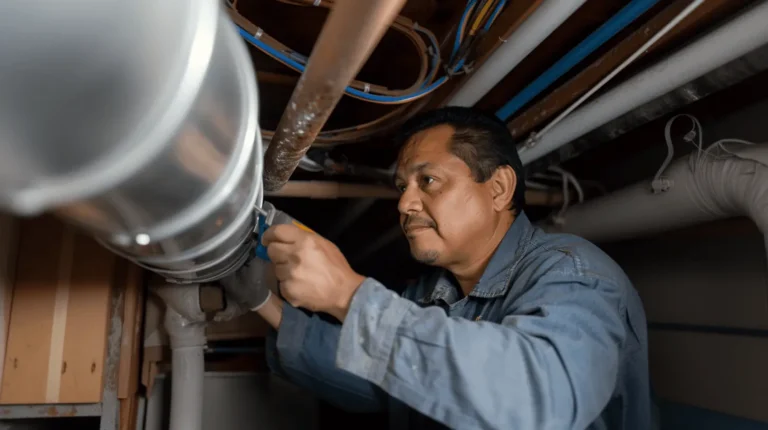
The window remains the most vulnerable disruption in the continuity of the building envelope. While the modern building industry has made monumental strides in insulation R-values and structural glazing strength, the method by which these openings are integrated into the weather-resistive barrier (WRB) continues to be a primary source of litigation and structural decay. Common Window Flashing Mistakes. Flashing is the thin, often invisible layer of defense designed to redirect liquid water away from the interior framing. When it fails, it does not do so loudly; it fails through the slow, silent accumulation of interstitial moisture that rots studs and feeds microbial growth long before a stain appears on the drywall.
In the high-performance building landscape of 2026, the complexity of window installations has increased as structures become more airtight. Historically, “leaky” buildings allowed for a certain degree of drying potential—moisture that entered the wall cavity could eventually evaporate. Today’s tight envelopes, however, have a much lower tolerance for error. A single breach in the flashing sequence can trap water within a wall system that has no way to breathe, leading to catastrophic failure in a fraction of the time seen in legacy constructions. This shift necessitates a move from “intuitive” flashing to “engineered” flashing.
Addressing the nuances of moisture management requires more than a passing familiarity with peel-and-stick tapes. It demands an understanding of the physics of water—specifically how surface tension, capillary action, and wind-driven pressure gradients force moisture into the smallest of gaps. The pervasive nature of common window flashing mistakes suggests that the industry often prioritizes the speed of the “rough-in” over the long-term durability of the assembly. This article provides a rigorous, editorial-level examination of the mechanical logic, material science, and systemic oversights that define the current state of fenestration waterproofing.
Understanding “common window flashing mistakes”
To properly categorize common window flashing mistakes, one must view the window opening as a 3D thermodynamic bridge. A common misunderstanding is that flashing is merely a “backup” to the window’s own flange. In reality, the window unit itself is often expected to leak eventually; the flashing is the primary system that ensures that leakage is safely channeled back to the exterior. The oversimplification that “caulk is a substitute for flashing” is perhaps the most dangerous fallacy in modern residential construction. Caulk is a maintenance item with a finite lifespan; flashing is a structural component meant to last the life of the building.
From a multi-perspective view, the general contractor sees flashing as a scheduling hurdle, while the forensic engineer sees it as a “reverse-lap” disaster waiting to happen. The most frequent errors involve the “sequencing” of materials—the fundamental logic of shingling. If a higher layer of material is tucked behind a lower layer, gravity will inevitably pull water into the building. This “reverse-lapping” is the quintessential example of how a high-quality material can be rendered useless by a low-quality installation logic.
Furthermore, the risk of oversimplification extends to material compatibility. In 2026, the market is saturated with various chemically distinct flashing tapes—asphalts, butylated rubbers, and silyl-terminated polyethers (STPE). Many of these materials react negatively when in contact with one another. For instance, the oils in certain flexible PVC window flanges can migrate into asphalt-based flashing tapes, causing the adhesive to “goo” and liquefy, essentially dissolving the seal. Understanding these chemical interactions is as vital as understanding the physical overlap.
The Historical Evolution of Moisture Redirection
In the era of massive masonry and old-growth timber, windows were often deeply recessed or protected by substantial overhangs. If water reached the frame, the wood was naturally rot-resistant and the wall was thick enough to absorb and release moisture without structural compromise. The transition to light-frame construction and the introduction of plywood and OSB changed the stakes. These engineered woods act like sponges, expanding and losing structural integrity when exposed to repeated wetting.
The 1980s and 90s saw the “Housewrap Revolution,” where the building paper (felt) was replaced by synthetic membranes. While these improved airtightness, they also changed the drying dynamics of the wall. The subsequent rise of “peel-and-stick” flashing in the 2000s offered a more robust seal but introduced the aforementioned compatibility and sequencing risks. Today, we are seeing a move toward liquid-applied flashing membranes, which offer a monolithic, gap-free seal that eliminates many of the “tape-joint” failures of the past.
Conceptual Frameworks: The Physics of the Opening
The “Drainage Plane” Mental Model
This framework treats the entire exterior of the building as a continuous waterslide.
-
Logic: Any water that penetrates the cladding must hit a secondary barrier (the WRB) and be directed downward and outward.
-
The Window Break: The flashing at the window sill is the “exit ramp” for this drainage plane. If the sill is flat rather than sloped, the water pools, eventually finding a path inward.
Capillary Action and the “Micro-Gap”
Water can move upward against gravity through narrow spaces (capillary action).
-
The Framework: A gap of 1/16th of an inch is enough to pull water into a wall.
-
Mitigation: The use of “capillary breaks”—purposefully created larger gaps or specialized materials—prevents moisture from being “sucked” into the framing.
The Pressure Equalization Framework
Wind creates a high-pressure zone on the outside of the building and a low-pressure zone inside.
-
The Framework: This pressure differential acts as a vacuum, pulling rain through even the smallest pinholes in the flashing.
-
Strategy: Effective flashing plans incorporate an air-seal on the interior side of the window to equalize pressure, reducing the “suction” effect on the exterior flashing.
Core Failure Categories and Material Trade-offs
| Failure Category | Primary Cause | Typical Hardware involved | Trade-off |
| Reverse Lapping | Incorrect sequencing | WRB, Head Flashing | Easy to spot; hard to fix after cladding. |
| Flat Sills | Lack of slope | Rigid Sill Pans, Flex-tape | Simple to install; high risk of pooling. |
| Adhesion Failure | Dirty substrate or cold | Acrylic/Butyl Tapes | Fast application; sensitive to temp. |
| Chemical Conflict | Plasticizer migration | PVC Windows, Asphalt Tape | Lower material cost; systemic failure. |
| Termination Gaps | Unsealed corners | Corner “Bowties” or patches | Common in fast builds; leak entry point. |
Decision Logic for Flashing Selection
Choosing between a liquid-applied system and a tape-based system involves a “Geometry Audit.” If the window openings are standard rectangles with clean OSB substrates, a high-quality acrylic tape plan is efficient and cost-effective. However, for complex “punched” openings, curved windows, or recessed “inies,” a liquid-applied STPE system is superior because it conforms to any shape without the risk of “fish-mouth” wrinkles that characterize poorly applied tapes.
Detailed Real-World Scenarios Common Window Flashing Mistakes
Scenario 1: The “Flat-Sill” High-Rise (Chicago, IL)
-
Constraint: High wind-driven rain on the 20th floor.
-
Mistake: The contractor used a flat 2×4 for the rough sill and applied tape over it without a slope.
-
Failure: Water collected under the window frame, sat in the tape “bowl,” and eventually seeped through the staple holes in the WRB.
-
Solution: Retrofitting with a sloped “sill wedge” to ensure a 5-degree positive slope toward the exterior.
Scenario 2: The Modern Farmhouse (Black Windows)
-
Constraint: Black PVC window frames absorb significant solar heat.
-
Mistake: Using standard asphalt-based tape.
-
Failure: The black frames reached 160°F in direct sun, causing the asphalt adhesive to melt and run down the siding.
-
Second-Order Effect: The adhesive failure allowed air-leakage, which then caused condensation inside the wall during winter.
Planning, Cost, and Resource Dynamics
The financial impact of common window flashing mistakes is overwhelmingly back-loaded. While the material for a correct flashing job might cost $40 per window, the cost to repair a failed window three years later can exceed $5,000 per opening when accounting for siding removal and structural repair.
| Expenditure Item | Estimated Cost | Strategic Reason |
| High-Performance Tape | $1.50 – $3.00 / lf | UV stability and long-term adhesion. |
| Liquid Membrane | $5.00 – $8.00 / sf | Seamless protection for complex shapes. |
| Sill Sloping Wedge | $10.00 / unit | Guarantees gravity-assisted drainage. |
| Third-Party Inspection | $500 – $1,000 / day | Provides E-E-A-T and verification. |
Tools, Strategies, and Technical Support Systems
-
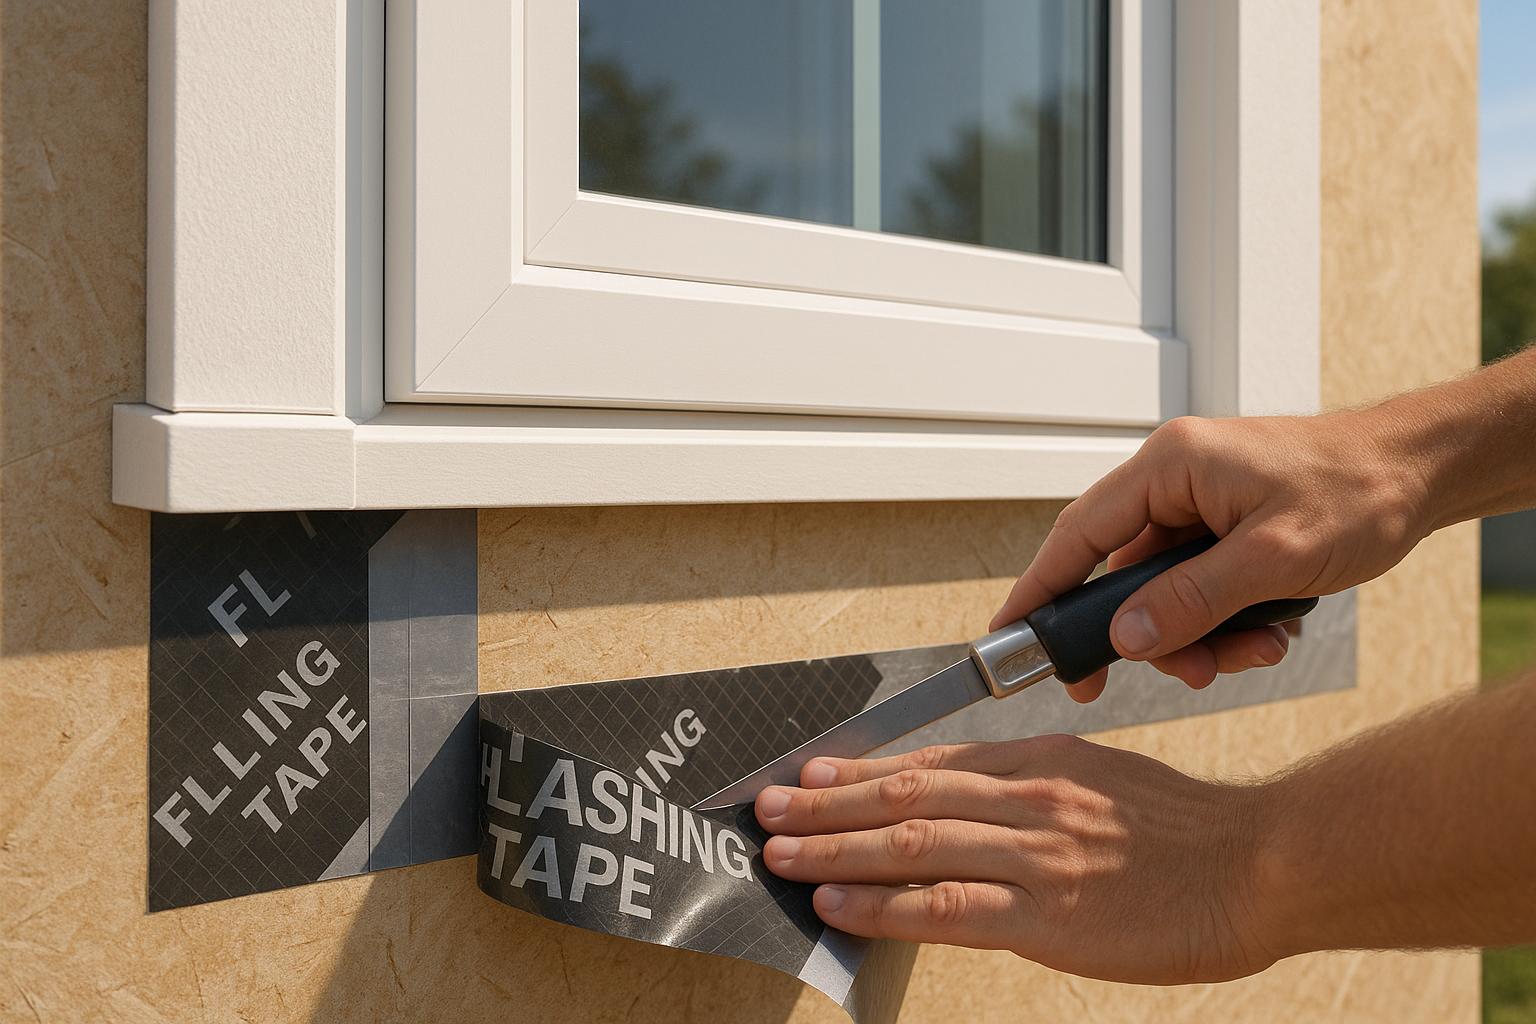
J-Rollers: Non-negotiable for tape application. Pressure-sensitive adhesives (PSA) require mechanical force to activate the bond.
-
Corner “Bowties”: Pre-manufactured corner patches that eliminate the need for complex, leak-prone “origami” folding of tape.
-
STPE Liquid Flashing: A moisture-cure polymer that can be applied to damp wood, solving the “wet jobsite” delay.
-
Blower Door Testing: While primarily for air, it identifies leaks in the flashing/window interface through air-movement detection.
-
Substrate Primers: Essential for adhesion on “hairy” OSB or in temperatures below 40°F.
-
Backer Rod and Sealant: The “Third Line of Defense” used on the interior to create the air-seal.
-
Stainless Steel Drip Caps: Rigid head flashing that provides a clean “kick-out” for water above the window.
Risk Landscape and Compounding Failure Modes
-
The “Double Barrier” Trap: Applying flashing on both the inside and outside of the window in a way that traps water. If water gets in, it must have a way out.
-
UV Degradation: Many flashing tapes are only rated for 30–90 days of sun exposure. If the siding installation is delayed, the tape’s chemical bond breaks down before the building is even dried in.
-
Wrinkle Capillaries: A single wrinkle in a flashing tape creates a “micro-tunnel” for water. Under wind pressure, water is forced through these tunnels to the framing.
Governance, Maintenance, and Long-Term Adaptation
Flashing governance requires a “Systems Approach” during the construction phase.
-
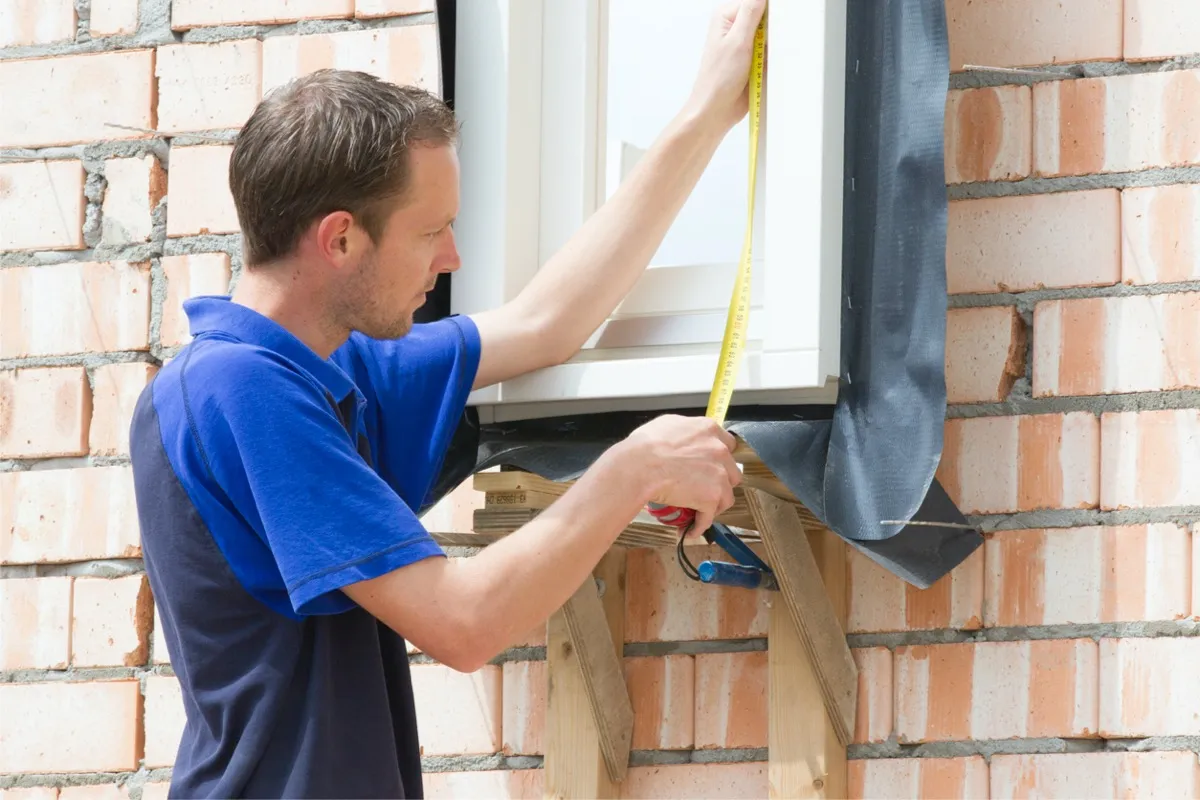
The Mock-up Protocol: Requiring the window crew to flash a single “sample” opening to be approved by the architect before the other 50 windows are touched.
-
Photo Documentation: Every window should have a timestamped photo of the sill, jamb, and head flashing before the siding is installed.
-
Review Cycles:
-
[ ] Verify the “Head Flashing” is tucked under the housewrap.
-
[ ] Check that the “Sill Flashing” is tucked over the housewrap.
-
[ ] Confirm no “reverse laps” exist at the transitions.
-
Measurement, Tracking, and Evaluation
-
Leading Indicator: Adhesion “Pull-Tests.” Does the tape stick to the specific OSB brand used on-site?
-
Lagging Indicator: Moisture meter readings taken from the interior studs after the first major storm.
-
Documentation Example: The “Window Schedule Sign-off”—a document verifying that the specific flashing manufacturer’s instructions were followed to maintain the 10-year system warranty.
Common Misconceptions and Oversimplifications
-
Myth: “The window flange is the flashing.”
-
Reality: The flange is a mechanical fastener; it is rarely watertight at the mitered corners.
-
-
Myth: “More tape is better.”
-
Reality: Excessive layers of tape create “humps” that can actually trap water or interfere with siding installation.
-
-
Myth: “Housewrap tape is the same as flashing tape.”
-
Reality: Wrap tape is designed for air; flashing tape is a thicker, “self-healing” membrane designed for water.
-
-
Myth: “You can’t flash in the rain.”
-
Reality: High-end liquid membranes and certain specialized tapes are designed specifically for damp-substrate adhesion.
-
-
Myth: “The drip cap is optional.”
-
Reality: In modern high-exposure builds, a rigid drip cap is the only way to ensure water doesn’t “roll” under the head of the window.
-
-
Myth: “Sealant is the secondary barrier.”
-
Reality: Sealant is an air-barrier; the flashing is the hydrological barrier.
-
Conclusion: The Synthesis of Detail and Durability
Mastering the prevention of common window flashing mistakes is a testament to an organization’s commitment to quality. It requires moving beyond a “checkbox” mentality and embracing a deep understanding of thermodynamics and fluid mechanics. In the 2026 construction era, where buildings are tighter and climate events are more severe, the margin for error has evaporated. A window that is flashed with “editorial” precision—focusing on the nuance of the corner, the chemistry of the adhesive, and the logic of the lap—becomes a long-term asset. Conversely, a window flashed with indifference becomes a ticking financial clock. The integrity of the building depends not on the glass, but on the invisible membranes that keep the structure dry.